

Documentation Index
Fetch the complete documentation index at: https://docs.praxis-ai.com/llms.txt
Use this file to discover all available pages before exploring further.
Integration Note: When your instance is integrated through Canvas or other SDK, users are automatically signed in and registered.
User List Management
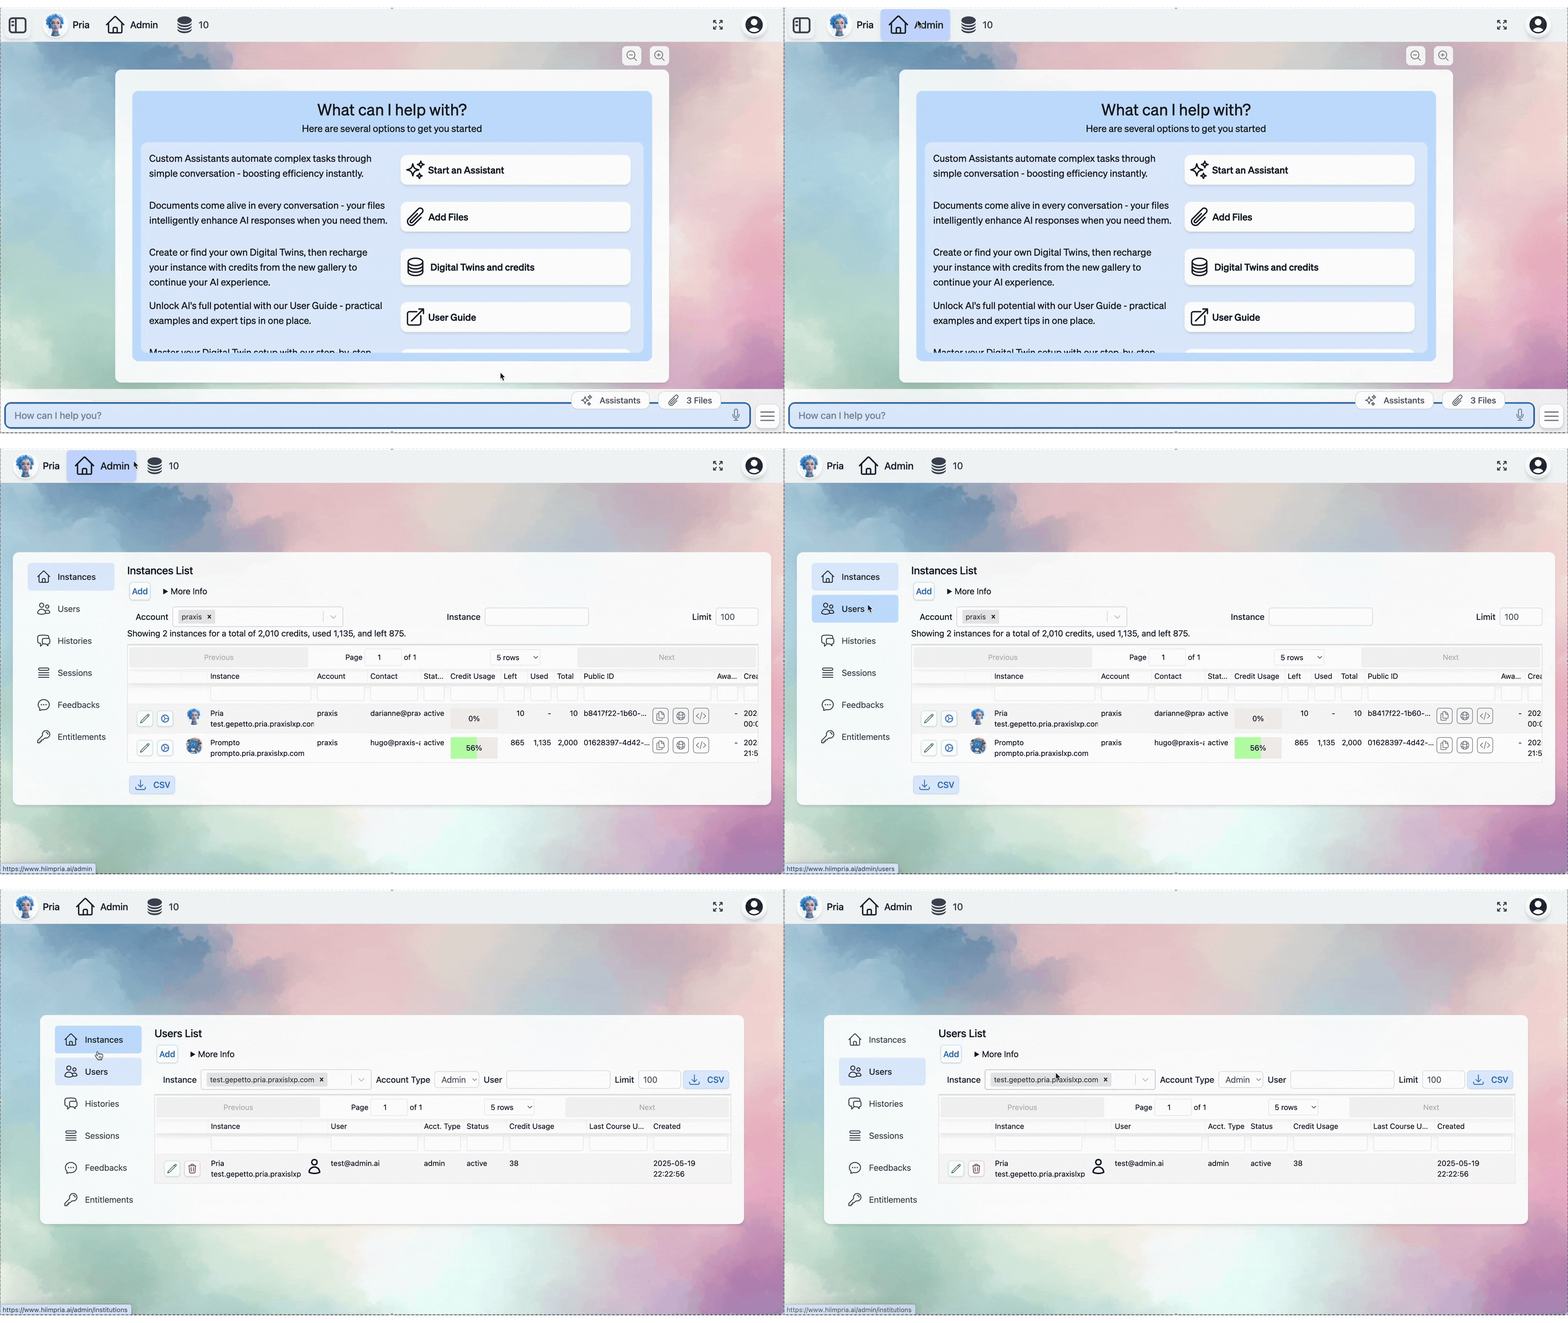
Viewing All Users
The user list displays all registered users in your instance with comprehensive filtering and search capabilities:- Search by Name or Email: Use the search bar to quickly locate specific users
- Filter by Account Type: Narrow results by Admin or User account
- Sort Options: Organize by registration date, last activity, or alphabetical order
- Pagination: Navigate through large user lists efficiently
User Details View
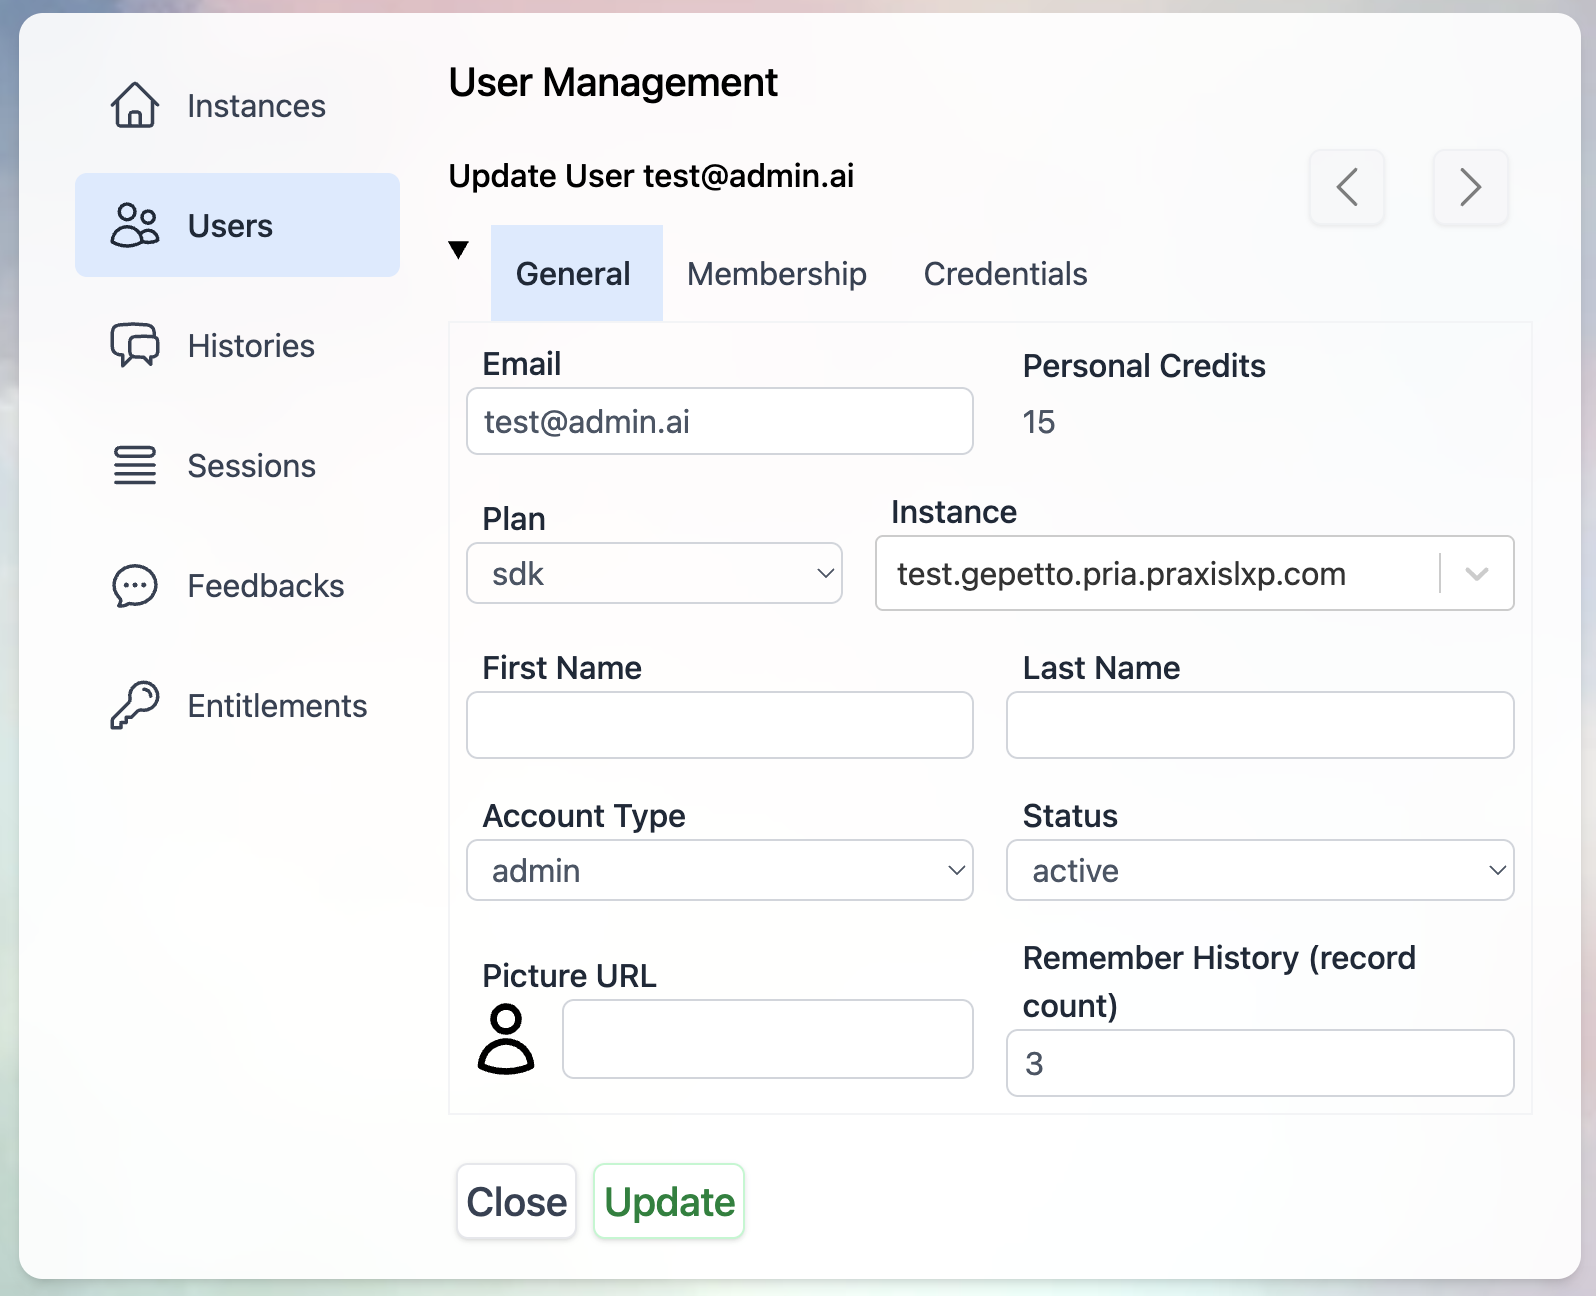
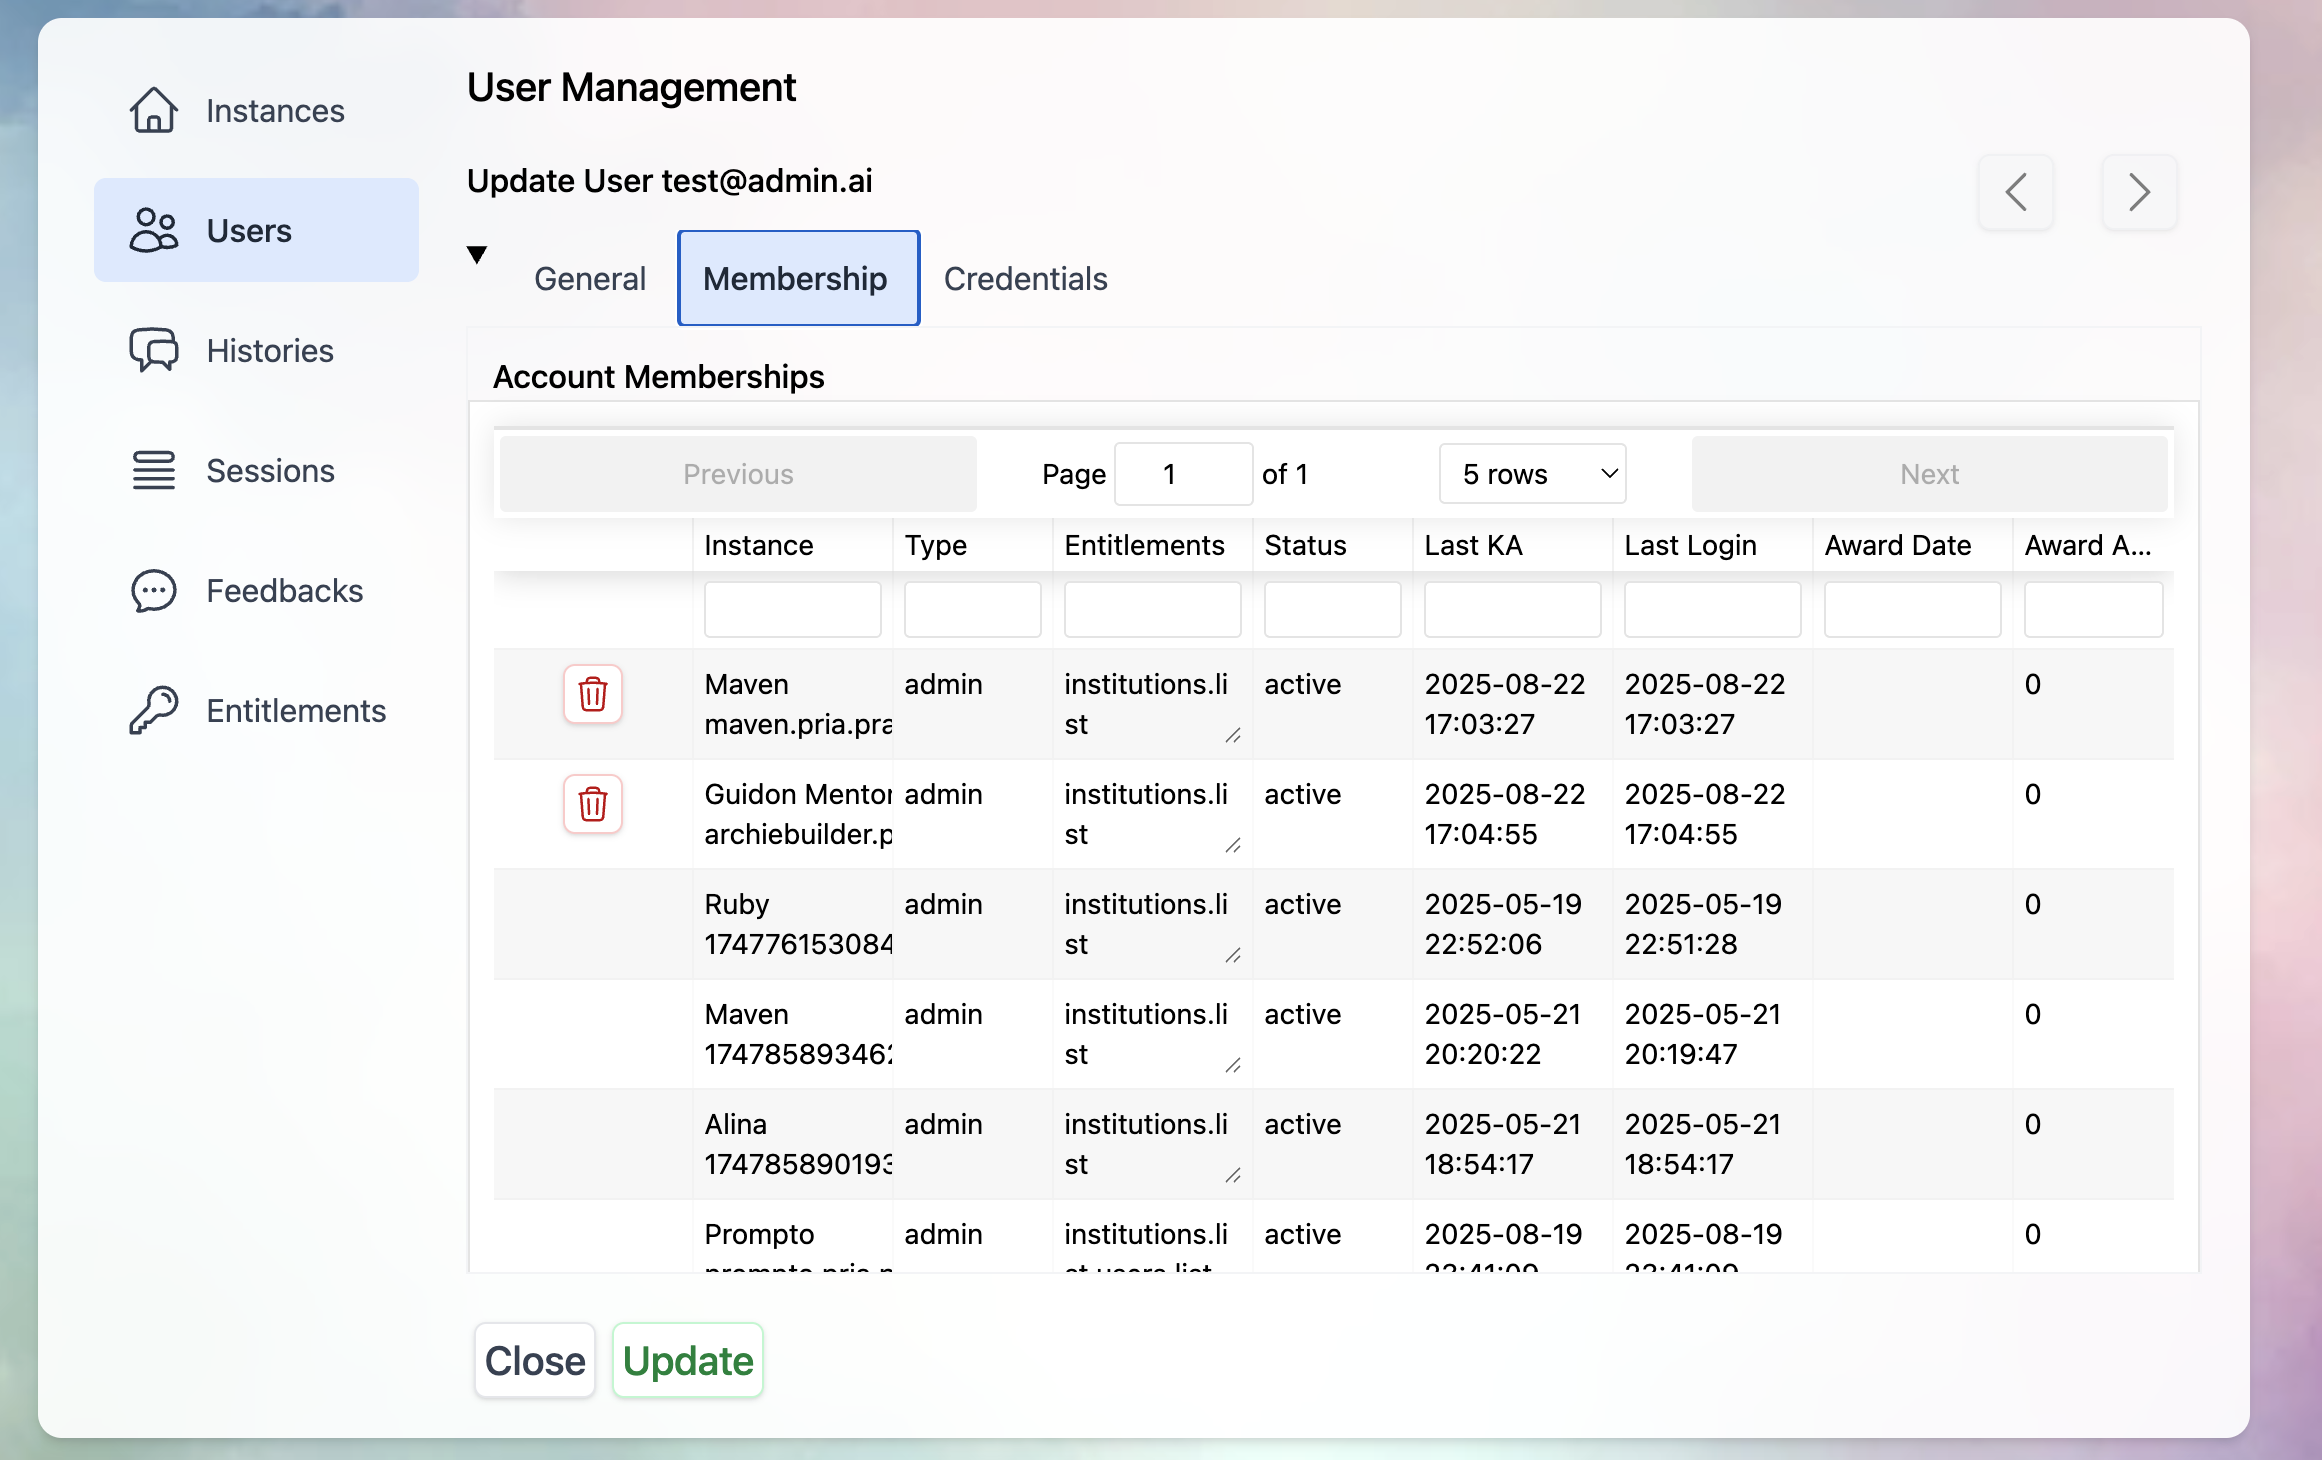
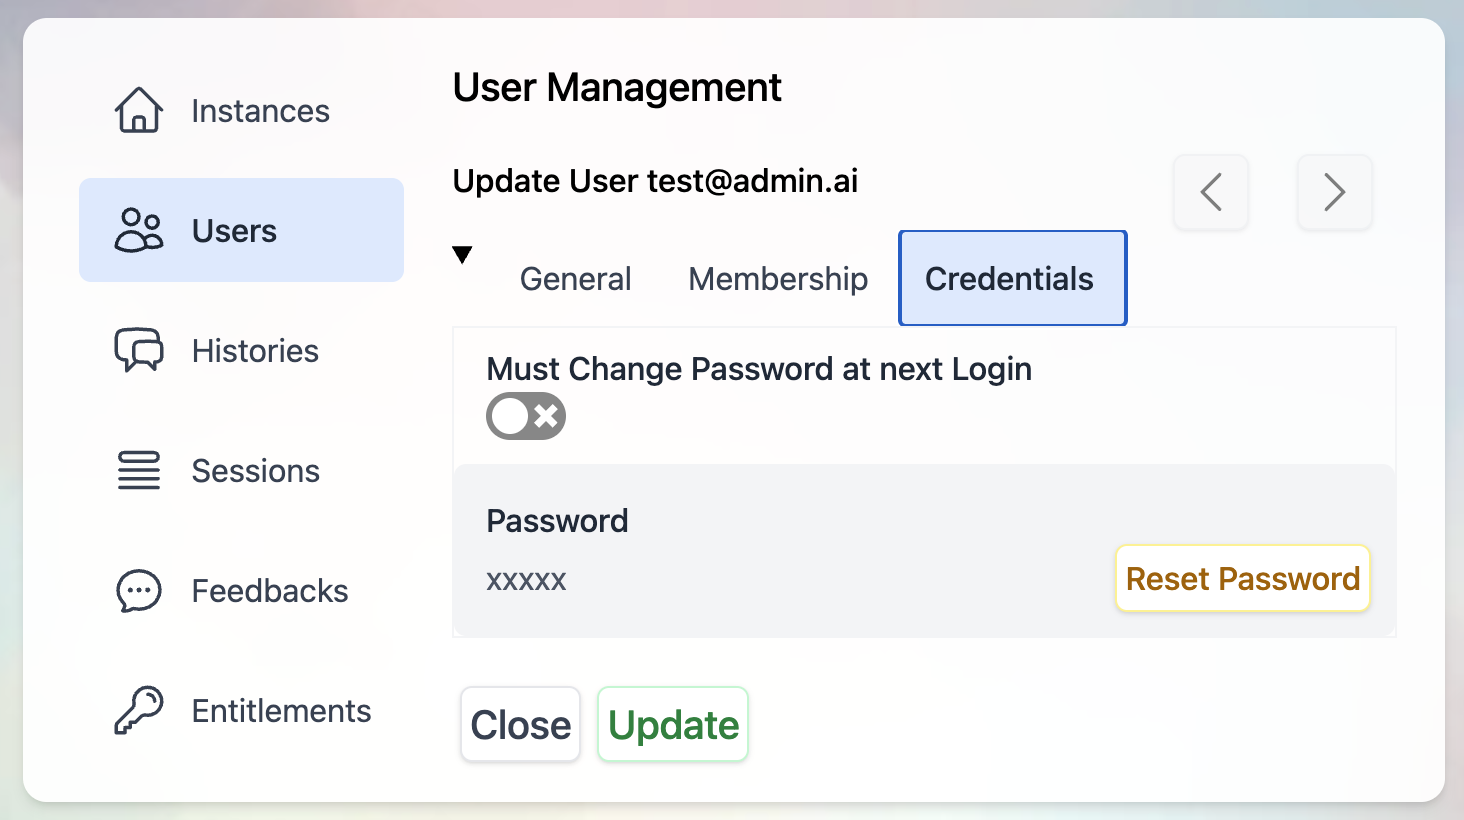
Click on any user to access their comprehensive profile:- General
- Membership
- Credentials
- Full name and email address
-
Account type and current status
User Actions
Individual User Management
Edit User
Edit User
Modify user information and permissions:
- Account Type Changes: Upgrade/downgrade between Admin or User
- Email Updates: Change primary email address
- Profile Information: Update name, preferences, and settings
- Status Management: Activate, deactivate, or suspend accounts. Inactive or suspended users are immediately blocked from AI interactions (chat, streaming, realtime voice, and tool execution). See Membership Status Enforcement for details
Delete User
Delete User
Remove users from the instance:
- Soft Delete: Deactivate while preserving data
- Hard Delete: Permanently remove user and associated data
- Data Export: Download user data before deletion
- Confirmation Process: Multi-step verification for safety
View Sessions
View Sessions
- Last login and status
Memory Parameters
Memory Parameters
Inspect and manage the memory parameters Pria stores for this user — namespaces, key/value pairs, and shared instance entries that the user (or Pria’s
set_user_memory tool) has saved over time.- Memory tab in the Edit User modal lists every memory entry for the user, grouped by instance for clarity (Personal entries in their own bucket).
- Visibility scope is enforced server-side: you only see entries from instances where you hold the
users.editentitlement. Super admins see everything. - Filter row: Search across name/value/description, filter by namespace, and filter by scope (All / Private (non-shared) / Shared only).
- Edit a row: opens a Lightbox letting you change the value, description, and the shared toggle (rows can move between user-private and instance-shared in either direction, as long as the row has institution context). The
key_nameandkey_namespacefields are part of the unique key and cannot be edited — to rename, delete the row and ask the user to recreate it. - Delete a row: confirmation Lightbox shows the row’s key and a preview of the value before you confirm. Hard delete (matching the runtime
set_user_memorybehavior). - Clear filtered: bulk-delete every row currently visible under the active filters. Confirmation shows a scrollable list of the exact rows that will be removed before you confirm.
Act As (Impersonation)
Act As (Impersonation)
Temporarily switch your session to see Pria exactly as the target user does — for support, debugging memory issues, validating an entitlement change, or reproducing a reported problem.Who can use it: super admins, plus admins who hold the
users.edit entitlement on at least one institution where the target has membership. The button is omitted entirely when you don’t qualify (no disabled-state confusion).Restrictions:- You cannot impersonate yourself.
- You cannot impersonate a super admin (would silently grant elevated rights).
- You cannot start a new impersonation session while one is already active — Stop the current one first.
- Open the Edit User modal for the target user.
- Click Act As… in the modal footer (left of Cancel/Update). The button is amber to flag that it changes your effective identity.
- A consent Lightbox explains: “you will see exactly what they see; every action you take will be recorded as theirs; you will lose access to admin pages until you stop.” It requires a written reason (1–500 characters, e.g. “Debugging support ticket #1234”).
- Confirm. Pria swaps your session to the target user, the page reloads, and the conversation/files/memory you now see all belong to the target.
- An amber Acting as
<email>pill stays pinned in the top navigation. Click Stop at any time to end the session and return. - The rest of the admin console is blocked — visiting any
/admin/*page returns 403 with a message asking you to stop impersonating first. The only exception is the Stop endpoint itself. - Sessions automatically expire after 1 hour (or sooner if your own session was about to expire). When the session ends, you’re returned to the admin console with a brief notice.
- If your own admin tokens are revoked while impersonating (e.g. a super admin terminates your session), the active impersonation dies on the next request.
start and stop writes a row to an internal impersonation_log collection capturing: your admin id, the target’s id, the stated reason, the start time, the end time (or null if you closed the tab without stopping), the TTL, the IP address, and the user agent. The log is retained for compliance review.Use this access only for the support purpose stated in your reason. Treat the user’s privacy with respect — you have visibility into their conversations, files, history, and memory.Adding New Users
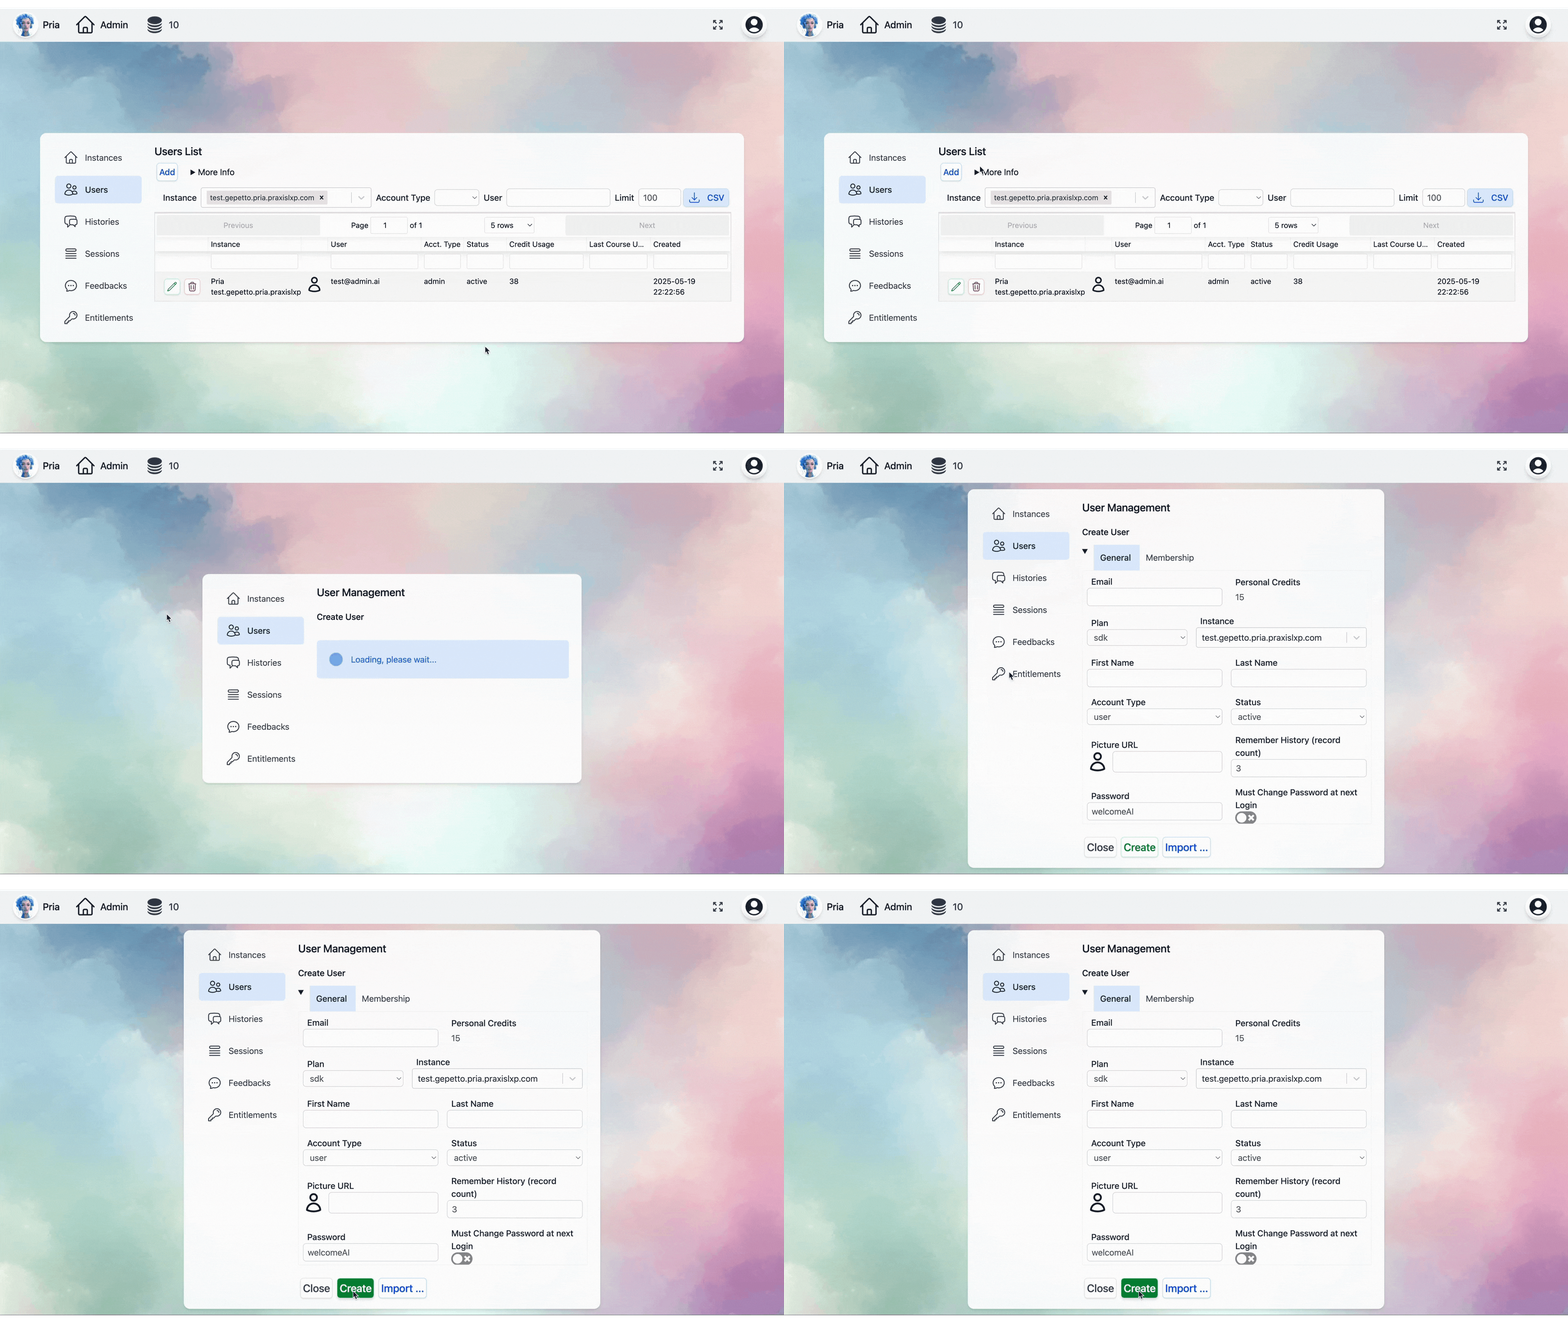
Individual User Addition
Enter User Information
Provide required details:
- Full Name: User’s complete name
- Email Address: Valid email for login and notifications
- Account Type: Select appropriate permission level
- Instance: Select the name of the digital twin
- Initial Password: Set temporary password (optional)
Bulk User Import
For adding multiple users simultaneously:CSV File Format
Import Process
Prepare CSV File
Create a properly formatted CSV with required columns:
- Name: Full user name
- Email: Valid email address
Upload File
- Click “Import” in the Users section
- Select your CSV file
- Review the preview of users to be imported
Configure Import Settings
- Account Type: Select either
useroradminbased on the required permission level - Account Status
- Choose
activeto enable immediate access - Choose
inactiveto create the account but prevent login until activated
- Choose
- Instance Assignment: Select the digital twin instance that this account will be associated with
- Default Password: Set the initial password for the new account
- Force Password Change: Enable this option to require the user to create a new password on their first login
Account Types & Permissions
Permission Levels
- Admin
- User
Full Platform Access
- Complete user management capabilities
- Instance configuration and settings
- Analytics and reporting access
- Digital twin customization rights
- Billing and subscription management
- Integration and API access